I have a small wooden sailing dinghy designed by Joel White that is supposed to be carvel planked, but the person who built it preferred the look of a lapstrake hull so that is what he did. The boat needs work, especially below the water line. So I'm wondering if I can put the effort into converting it to what it is supposed to be (and what I prefer). I have the design/build plans and I don't see how the build was modified from the original other than the planking. Is this an impractical idea?

The Boat Design & Boatbuilding Site
Install the app
How to install the app on iOS
To install this app on your iPhone:
- Tap the Share button at the bottom of Safari.
Tap ... if Share is not visible, then Share - Tap Add to Home Screen
Tap View More and scroll down if needed to see Add to Home Screen, then Add to Home Screen. - Tap Add on the top right to confirm.
Note: This feature may not be available in some browsers.
You are using an out of date browser. It may not display this or other websites correctly.
You should upgrade or use an alternative browser.
You should upgrade or use an alternative browser.
Convert Clinker Hull to Carvel
- Thread starter gunter
- Start date
Apart from having to completely replank the boat there isn't anything speaking against it. You might have to pad the frames if they are joggled, and maybe use rivets one size larger if you mangle the holes in the frames while removing the existing ones.

bajansailor
Marine Surveyor
- Joined
- Oct 27, 2007
- Messages
- 4,031
- Reaction score
- 1,890
- Location
- Barbados
The boat needs work, especially below the water line.
What is the nature of the work that is required - is the hull planking rotten, and it now has to be renewed?
Which one of Joel White's designs is this - do you have any photos that you can post on here of her?
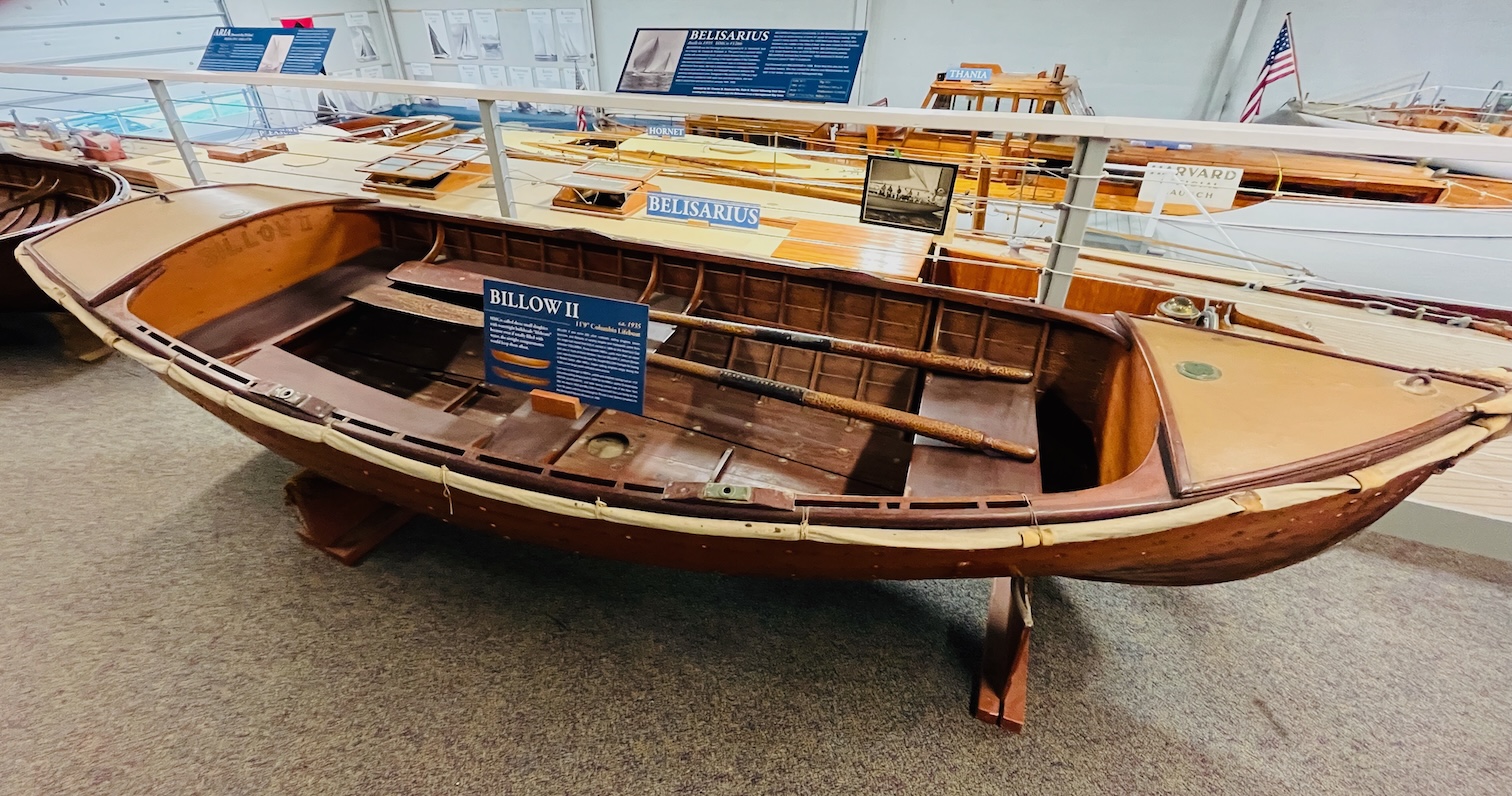
The boat is a Catspaw: Joel White's reinterpretation of N. Herreshoff's Columbia tender. The White design calls for carvel planking but I did some investigating last night and I believe that Herreshoff built them using lapstrake construction. I visited the Herreshoff museum recently, a must-see if you are ever in Rhode Island, and took this photo of an original Columbia:
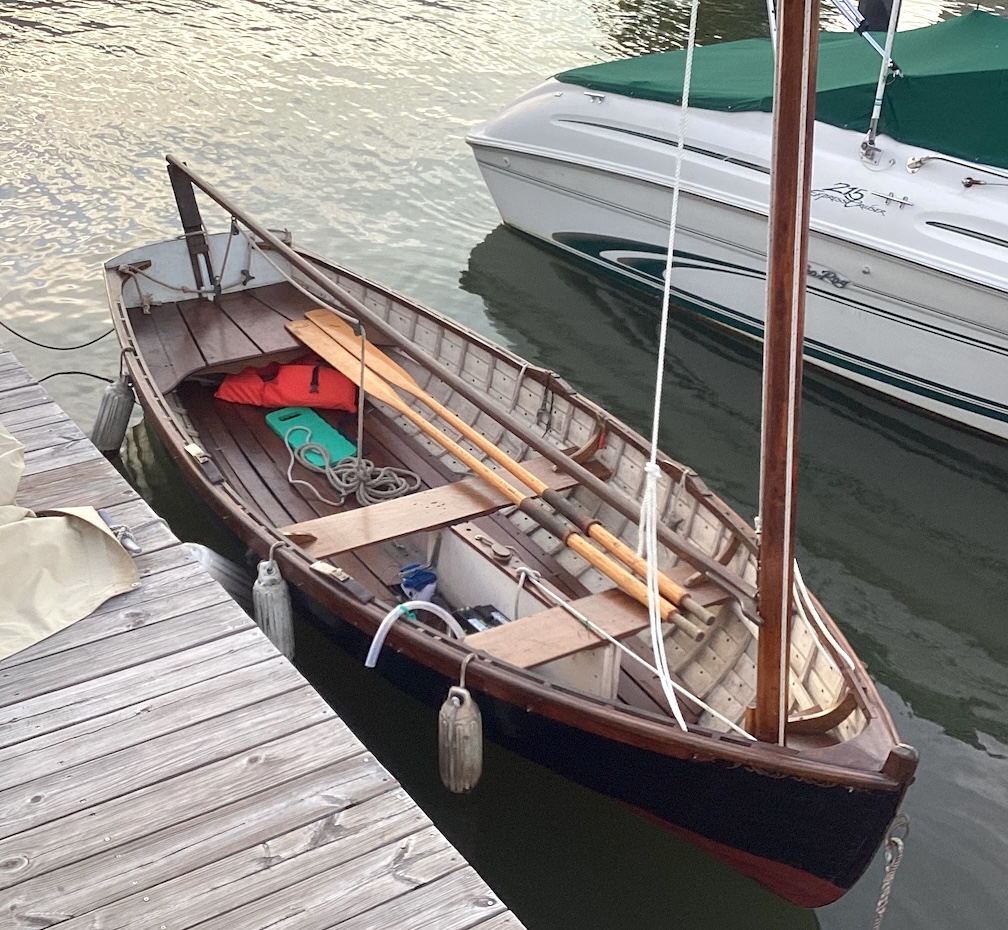
I love the airtight compartments forward and aft. The covered bow must really help in certain conditions. So, I acquired a catspaw recently from the original owner who did a lovely job building her with Atlantic white cedar over oak ribs. Here she is:
Regarding the condition: the boat was built from the waterline down using Walter Simmons method of cutting a shallow groove in the lap seam and then filling in the seam with a bead of caulk. I don't know what type of caulk was originally used, but over the years the owner would address cracking in the caulk and leaks by reapplying (caulk over caulk). Over time, the caulk has really built up so I decided to scrape/sand the planks and reef out the old caulk.
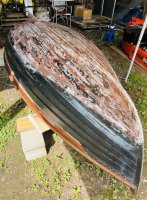
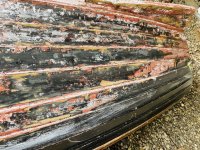
This has proven difficult no matter what I try, and I'm not confident that I can ever get the overlapping areas and grooves clean enough to apply a new sealant w/o doing a number on the cedar. Also, I'm finding the overlap area to be really opened up (i.e., a large gap where the planks meet); more than a shallow groove cut by a screwdriver. This may be due to the wood drying out, I'm not sure.
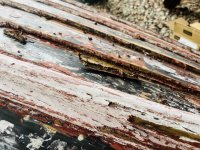
Anyway, this started me thinking that it may be easier, and better for the boat, to replace four planks below the waterline starting with the planks above the garboards. That lead to the idea of changing to carvel planking. Given Herreshoff's were lapstrake I think I should drop the idea of carvel planking and focus on what I have. Any advice is appreciated.
I love the airtight compartments forward and aft. The covered bow must really help in certain conditions. So, I acquired a catspaw recently from the original owner who did a lovely job building her with Atlantic white cedar over oak ribs. Here she is:
Regarding the condition: the boat was built from the waterline down using Walter Simmons method of cutting a shallow groove in the lap seam and then filling in the seam with a bead of caulk. I don't know what type of caulk was originally used, but over the years the owner would address cracking in the caulk and leaks by reapplying (caulk over caulk). Over time, the caulk has really built up so I decided to scrape/sand the planks and reef out the old caulk.
This has proven difficult no matter what I try, and I'm not confident that I can ever get the overlapping areas and grooves clean enough to apply a new sealant w/o doing a number on the cedar. Also, I'm finding the overlap area to be really opened up (i.e., a large gap where the planks meet); more than a shallow groove cut by a screwdriver. This may be due to the wood drying out, I'm not sure.
Anyway, this started me thinking that it may be easier, and better for the boat, to replace four planks below the waterline starting with the planks above the garboards. That lead to the idea of changing to carvel planking. Given Herreshoff's were lapstrake I think I should drop the idea of carvel planking and focus on what I have. Any advice is appreciated.
Last edited:
Scraper and heatgun are in order. There are also chemical removers for sikaflex and co, look it up. For the gaps I would try more rivets in the lands and tightening the existing ones. Only if this all fails would I replank.
I couldn't find anything for Sikaflex specifically, but I found DeBond Marine for 5200 and other polyurethane adhesives. A heat gun is a good idea and I'll try that next. This stuff is so difficult to remove and the Atlantic white cedar is so soft.
I didn't realize you can tighten an existing rivet but looked it up. Thank you!
I didn't realize you can tighten an existing rivet but looked it up. Thank you!
DeBond Marine formula says its good for Sika 291. What Marine Formula Can Do https://marineformula.com/pages/product-uses You will still need to scrape it off, it doesn't dissolve the sealant like magic, it softens it up and it lets go of the substrate (works better with non porous substrates).
If there's currently only one rivet in the lands between the frames it's probably insufficient and you should think about adding some. In the photo of the original you can clearly see two rivets between the frames.
If there's currently only one rivet in the lands between the frames it's probably insufficient and you should think about adding some. In the photo of the original you can clearly see two rivets between the frames.
> If there's currently only one rivet in the lands between the frames it's probably insufficient and you should think about adding some. In the photo of the original you can clearly see two rivets between the frames.
You are absolutely right. Good eye and great advice. Thank you.
You are absolutely right. Good eye and great advice. Thank you.
wet feet
Senior Member
- Joined
- Nov 26, 2004
- Messages
- 1,907
- Reaction score
- 662
- Location
- East Anglia,England
I don't seek to be contrarian but I don't see the point of converting the boat to carvel, it will have a greater tendency to leak after a spell out of the water and the amount of work,on a small and simple boat, is about the same as building a new boat. It also takes a lot of effort and some hollowing planes to get the planks to fit against the existing frames. I understand a little about the Simmons technique and done well it helps with leakage issues when a boat is launched or permanently dry sailed. If the sealant has been poorly applied then it might be simplest to make a version of the traditional seam cleaning tool. Just about everyone uses an old file that has had it's tang bent over and ground to suit the seam shape. It takes heat to do this but the tool should last a long time. With a clean seam and new sealant, rather than just adding sealant,you might stand a chance of success.
rangebowdrie
Senior Member
- Joined
- Nov 28, 2009
- Messages
- 342
- Reaction score
- 148
- Location
- Oregon
In the old days when even skilled labor was cheap, lapstrake construction was a fast way to build.
No hollowing/rounding/fairing like carvel, and generally no caulking except along the backbone/stem/keel/transom.
Soft woods like Cedar would swell up to keep the water out, and when the boat was hauled there were no seams to dry out.
In those days the seam compounds had little adhesive strength, and thin planks don't want to accept caulking and so were prone to having loose calking.
And with a billion lengthwise fasteners the boat could have good longitudinal rigidity without much in the way of lengthwise framing.
The downsides? for a sailboat the increased wetted surface and the increased disturbance of water flow makes them generally slower vs an identical hull that's carvel.
And a million feet of ledges that hold water and dirt.
Today people take old designs and cold mold them.
No hollowing/rounding/fairing like carvel, and generally no caulking except along the backbone/stem/keel/transom.
Soft woods like Cedar would swell up to keep the water out, and when the boat was hauled there were no seams to dry out.
In those days the seam compounds had little adhesive strength, and thin planks don't want to accept caulking and so were prone to having loose calking.
And with a billion lengthwise fasteners the boat could have good longitudinal rigidity without much in the way of lengthwise framing.
The downsides? for a sailboat the increased wetted surface and the increased disturbance of water flow makes them generally slower vs an identical hull that's carvel.
And a million feet of ledges that hold water and dirt.
Today people take old designs and cold mold them.
wet feet
Senior Member
- Joined
- Nov 26, 2004
- Messages
- 1,907
- Reaction score
- 662
- Location
- East Anglia,England
I wouldn't have too many concerns about a clinker hull being slower than it's carvel sister,the difference will be microscopic. Cold moulding does produce a clean and leakproof hull, but at the expense of a lot of hours.It gets much worse if the system adopted is first plank the boat with strips, then plane fair and add a surface skin of veneer-then sand and add a layer of glass-then fill the weave and apply coating of choice. Traditional clinker uses flat planks, quite a number of fastenings and then you paint.For lots of fastenings, study an Uffa Fox era International 14.......
Thanks for all the responses and good advice. After a weekend toiling away on this adhesive sealant, I've made some progress:
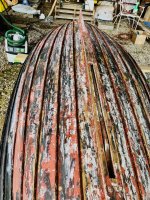

There is still a lot to do. I really don't know how I am going to get the overlap area between the planks clean.
There is still a lot to do. I really don't know how I am going to get the overlap area between the planks clean.
Last edited:
wet feet
Senior Member
- Joined
- Nov 26, 2004
- Messages
- 1,907
- Reaction score
- 662
- Location
- East Anglia,England
Do you need to get the lands clean?To do it thoroughly would mean removing all the planking and you would do lots of damage in the process.Could you use either a cabinet maker's flat scraper or a shave hook to sharpen the feature to a clean corner and then,after applying any necessary primer,apply new sealant.If you possess a set of patternmaker's radius balls they could be used to achieve uniformity.Failing that,a round head screw driven into the end of a 3/4" square batten would do much the same thing.If you clean up carefully the result ought to be neat and free from leaks.
I think so to insure the new sealant adheres properly, although your suggestion to prime the area first is a good idea. I want to clean it out and run a small bead of sealant.Do you need to get the lands clean?
Forum posts represent the experience, opinion, and view of individual users. Boat Design Net does not necessarily endorse nor share the view of each individual post.
When making any potentially dangerous or financial decision, always employ and consult appropriate professionals. Your circumstances or experience may be different.
When making any potentially dangerous or financial decision, always employ and consult appropriate professionals. Your circumstances or experience may be different.
Advertisement:
Similar threads
- Replies
- 7
- Views
- 6,941

- Replies
- 6
- Views
- 5,210

- Replies
- 10
- Views
- 1,734

- Replies
- 35
- Views
- 6,133
- Replies
- 8
- Views
- 4,456
