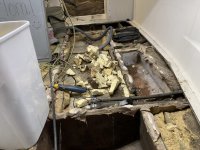
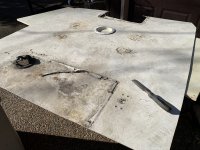
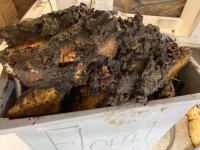
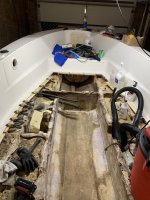
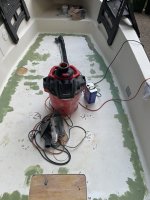
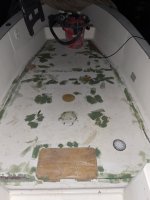
1995 Sailfish 176 Deck Replacement

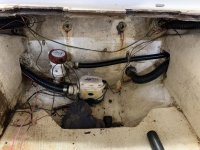
They could have routed the hoses right over top of that stringer. Unreal.

 
How did your boat turn out? I have a 1995 176 cc sailfish I'm currently working on. A little different than yours. Would love to see pictures
 
How did your boat turn out? I have a 1995 176 cc sailfish I'm currently working on. A little different than yours. Would love to see pictures

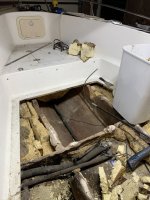
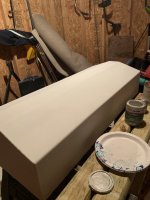
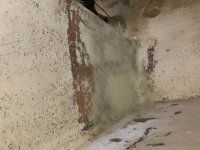
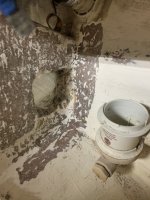
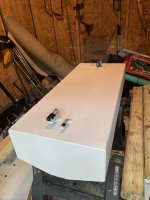
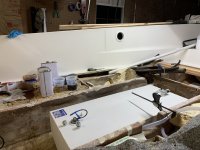
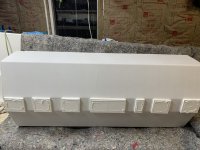
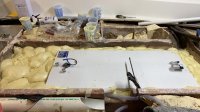
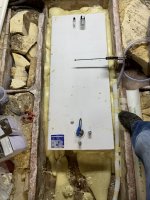
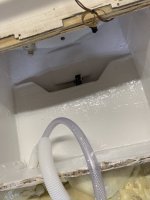
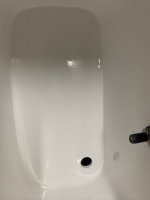
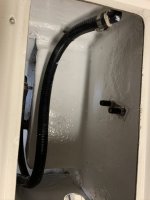
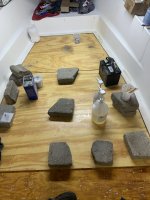
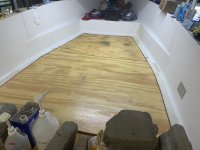
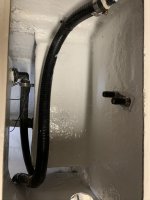
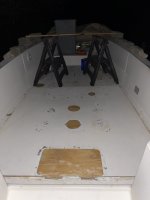
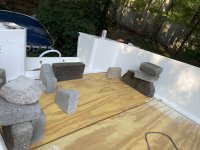
Hey Josh - Better late than never. Life threw me a few curveballs in the last year and I tabled the project from about June 2020 til about a couple months ago. It’s been a process. I ended up laying in a double layer of 3/4” plywood for the deck. That got me to level where I could epoxy the old top skins on. I’m sure some on here will scoff and say I should have just put strips onto the stringers then added a plywood deck over top but whatever, it’s my boat and the new deck is solid as ****. I took 25 gallons out of the original fuel tank size which will more than offset the weight difference and give me a ton of wood to put a mini t-tower I’m planning on down into. Speaking of stringers… the laminate is so thick and well incorporated into the hull with the typical seacraft’esque box system I decided to leave it be even though parts were wet, parts were pretty much gone. I have zero worries given the laminate thickness and construction of the stringers. Even with no wood left it would still be plenty strong in an 18’ boat. I’m actually about to glue the rear section of the top skin back on at this point. Underneath I replaced all wiring, added a wet storage area in front of console, removed all old (wet and sludgy and otherwise good) foam and re-poured it, added a new 40 gallon aluminum tank etched and coated with Interlux Interprotect, all new fuel lines, filler, vent, etc., painted bilge, re-finished bait well which involved glassing in bottom to cut correct opening for the standpipe I bought. All drain hoses replaced where needed and I put in hoses for an optional livewell in front of console. Painted bilges and heavily glassed in those stupid holes cut into the rear stringers. So that’s where I’m at… finishing gluing down top skin onto deck then fix all old holes in the skin and fair everything. Then nonskid, install console, etc and begin working on cosmetics before re-rigging the motor. Still thinking I’ll paint hull above and below rubrail but may stick with gelcoat above if I can bring it back enough. Lots left to do. I’ve learned a ton though throughout the process, my first partial restoration attempt. I have no doubt it’ll be a sweet looking and performing rig when I’m done with it. I’ve uploaded a bunch of pics taken along the way. Hope this helps somebody out.
B7EC7915-11A3-492A-BA1E-4E628119DF95.jpeg
B6840207-9AE0-41CA-B594-0308475DFDA0.jpeg
A13F15D0-31FE-46FD-A08C-FE159296F915.jpeg
C1A4D8F6-61D8-4CA0-915A-B609867054D8.jpeg
D28BB2CD-4631-4D72-8C5D-522DF253C4BD.jpeg
51341783-F316-42D6-8B36-69A68BC082C0.jpeg
 
Last edited:
More pics
 

Attachments

  • 650A2F80-6FFE-4363-B2A0-915AC81648D7.jpeg
    650A2F80-6FFE-4363-B2A0-915AC81648D7.jpeg
    298.4 KB · Views: 339
  • E5D93E6B-105F-4CE7-8D3E-9FDA3753C9FC.jpeg
    E5D93E6B-105F-4CE7-8D3E-9FDA3753C9FC.jpeg
    185.8 KB · Views: 358
  • F2147D3D-4196-4355-9353-B378D7037DD4.jpeg
    F2147D3D-4196-4355-9353-B378D7037DD4.jpeg
    275.1 KB · Views: 361
  • FD59AB19-3AA4-4EBA-B2A3-B8A914AF0F10.jpeg
    FD59AB19-3AA4-4EBA-B2A3-B8A914AF0F10.jpeg
    389.8 KB · Views: 370
  • 702B2F50-8A9D-45E0-B95B-434D975E8684.jpeg
    702B2F50-8A9D-45E0-B95B-434D975E8684.jpeg
    345 KB · Views: 345
  • E258AFD3-5AE4-411D-B4FF-9403F7ABEE24.jpeg
    E258AFD3-5AE4-411D-B4FF-9403F7ABEE24.jpeg
    195.4 KB · Views: 371
  • 2A00C002-7D6B-41B1-BE7A-729549EA9B88.jpeg
    2A00C002-7D6B-41B1-BE7A-729549EA9B88.jpeg
    314.4 KB · Views: 365
  • 49EAD725-B9E5-4591-9F31-3549E517921C.jpeg
    49EAD725-B9E5-4591-9F31-3549E517921C.jpeg
    126.2 KB · Views: 362
  • 50C364BD-6EAE-4E26-88DC-388CF784E499.jpeg
    50C364BD-6EAE-4E26-88DC-388CF784E499.jpeg
    183.1 KB · Views: 381
  • 88923756-CEAA-4A52-A17C-F47601FAF3B9.jpeg
    88923756-CEAA-4A52-A17C-F47601FAF3B9.jpeg
    159 KB · Views: 366
More pics.
 

Attachments

  • B4AE95AD-9965-4B32-92D2-B834880DD012.jpeg
    B4AE95AD-9965-4B32-92D2-B834880DD012.jpeg
    142 KB · Views: 351
  • CC6A48D4-064C-4632-8927-947508818E0A.jpeg
    CC6A48D4-064C-4632-8927-947508818E0A.jpeg
    258.2 KB · Views: 329
  • EDC25C49-1EB6-449B-BBEC-DA2C620207A3.jpeg
    EDC25C49-1EB6-449B-BBEC-DA2C620207A3.jpeg
    273.2 KB · Views: 362
  • C51CDF5E-9544-456B-926F-CC07290B941F.jpeg
    C51CDF5E-9544-456B-926F-CC07290B941F.jpeg
    382.9 KB · Views: 343
  • 38D034A8-56DA-4FB7-8445-5FE363C7C585.jpeg
    38D034A8-56DA-4FB7-8445-5FE363C7C585.jpeg
    196.4 KB · Views: 335
  • 7D747EC3-D7C1-4986-B8C5-CB3A3C2AF535.jpeg
    7D747EC3-D7C1-4986-B8C5-CB3A3C2AF535.jpeg
    98.6 KB · Views: 342
  • 659DF779-E5C4-4872-A1D9-269AF3E09B4F.jpeg
    659DF779-E5C4-4872-A1D9-269AF3E09B4F.jpeg
    34.4 KB · Views: 315
  • EFC8D395-3D00-4840-875A-A4775D0E5D87.jpeg
    EFC8D395-3D00-4840-875A-A4775D0E5D87.jpeg
    98.5 KB · Views: 340
  • F81D4649-849D-451C-B0F7-A9A0C7357090.jpeg
    F81D4649-849D-451C-B0F7-A9A0C7357090.jpeg
    154.6 KB · Views: 355
  • C2DB907D-30A6-4148-AB2E-FCC89D73F26C.jpeg
    C2DB907D-30A6-4148-AB2E-FCC89D73F26C.jpeg
    213.2 KB · Views: 339
  • E3BF0943-CAA6-4CBA-8925-028C673A0E4C.jpeg
    E3BF0943-CAA6-4CBA-8925-028C673A0E4C.jpeg
    106.8 KB · Views: 340
  • AB9505B9-823D-4DA5-868B-EA3250BE15AD.jpeg
    AB9505B9-823D-4DA5-868B-EA3250BE15AD.jpeg
    72.6 KB · Views: 363
Filling in lots of screw holes, gouges, and associated grind outs recently. Sand and repeat. It’s coming together slowly but surely.
 
Progress pics
 

Attachments

  • 3FDB5682-9698-4239-B18C-397A07462525.jpeg
    3FDB5682-9698-4239-B18C-397A07462525.jpeg
    163.3 KB · Views: 318
  • image.jpg
    image.jpg
    109.8 KB · Views: 300
Using TotalBoat epoxy fairing compound. Easy to use, very forgiving. I like it.
 
Forum posts represent the experience, opinion, and view of individual users. Boat Design Net does not necessarily endorse nor share the view of each individual post.
When making any potentially dangerous or financial decision, always employ and consult appropriate professionals. Your circumstances or experience may be different.

  • Back
    Top